BlackJack SolderWerks BK3050 Solder Pot Repair Service
|
|
If you own a BlackJack SolderWerks BK3050 Solder Pot pot that is in need of repair or
you need it modified to fit your unique problem, tell Patented Inventor,
Jon Krahmer and he will be happy to do it for you. You can contact Jon by using
the following message form...
|
Contact Jon at ElectraSoft for a Quote
I will NEVER share or sell this information about you!
I am
Jon Krahmer, and I enjoy helping people achieve their goals by designing, building,
modifying, refurbishing, or repairing electronic. I also do related programing to operate said
electronics.
Please let me know what I can do for you today . . .
|
Blackjack BK3050 Images
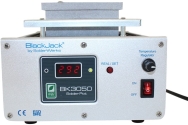
BlackJack BK3050 Front
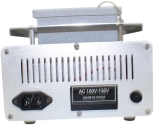
BlackJack BK3050 Back
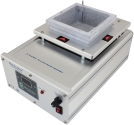
BlackJack BK3050 Above
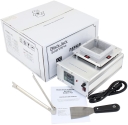
BlackJack BK3050 All
BlackJack BK3050 Manual
|
Upgraded and Refurbished Blackjack BK3050 Controllers
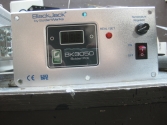
Refurbished Blackjack
BK3050 Controller+
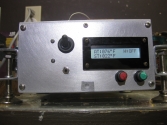
Upgraded Blackjack
BK3050 with PID
Plus LCD Display+
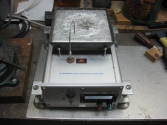
Upgraded Blackjack
BK3050 to handle
PCB up to 5.5 inches+
|
About the BlackJack SolderWerks BK3050 Solder Pot
o AC Input: 110VAC
o Power Consumption: 500 watts max
o Heating Technology: Infra Red
o Internal dimensions of solder pot: 3 5/8" x 3 5/8" x 1 3/4" (22.9 Cubic inch)
o Includes pickup tongs and scraper
o Popular Solder Works solder pot machine
o Leaded Solder Pot for Soldering and De-soldering
o Lead-Free Desoldering Solder Bath
List of a few services we offer
o Solder pot repair service
o Custom PCB design and manufacturing
If it is broken we fix it.
Some Solder Pot Upgrades I Offer
o Add a cooling fan.
o Replace the Controller with a PID.
o Replace the Control Panel with one that gives you Easier Control and Enhanced Display.
o Displays Actual-Temperature and Set-Temperature Simultaneity.
o Switch from Celsius to Fahrenheit and back using a front panel toggle switch.
o Larger Solder-Pot.
Solder Pot Definition and Use
Solder pots are temperature controlled tanks or pots that are used to tin wires
and soldering tips. Solder pots are also used to solder parts to pre-assembled
printed circuit boards, by dipping the PCB into the pot of molten solder. This
is particularly useful when working with electronics such as printed circuit
boards (PCBs) with through-hole leaded components.
How to solder parts to a PCB using a Solder Pot
Populate your PCB by securing all of the through-hole leaded components to the
PCB. Heat the solder pot to the appropriate temperature. Flux the under-side
of the PCB. Dip the Circuit Board it the solder.
How I solder parts to a PCB using my Custom Built Lead-Free Solder Pot
o Secure all components to the PCB.
o Using heat resistant tape, mask all mounting holes on the bottom of PCB.
o Turn on fume extraction system consisting of a fan.
o Heat my Modified Black Jack Solder-Pot to 558°F or 292°C.
o While Solder-Pot is heating, using a paint brush, I coat the bottom of the
PCB with a thin layer of Water Soluble Flux.
o Using solder-tongs, dip for 3 seconds.
o Be VERY careful to: Keep the PCB level at all times and NEVER let the PCB go
below the surface of the solder.
o During said 3 seconds, I agitate the PCB in an up and down action, in about 1/8"
strokes, about 15-20 times. This action better fills voids, giving the same
results that you would expect from an expensive wave-solder machine.
o Slightly lifting the right side first, while briskly sweeping to the right,
lift the PCB from solder pot, and hold in front of a fan for 3 seconds.
o Remove heat-tape.
o Using a stiff tooth brush, dip brush in liquid dish soap.
o Smear the soup over the bottom of PCB.
o Add a little water and lather the bottom of the PCB.
o Hold under running water and remove soup with the brush.
o Submerge in clean water while moving side to side, forward and back.
o Place PCB in an airflow dehydrator at 125°F for 10 minutes.
o Drop temperature to 90°F for another 5 minutes.
How to remove defective parts from a PCB using a Solder Pot
Another popular use for a Solder pot is to use solder-tongs to hold the PCB in
the solder bath just until the solder holding the part to the PCB has melted.
Then using the appropriate tool, lift the component from the board.
ElectraSoft PID Solder Pot
o No programing or setting the date and time required.
- I assume you have a watch on your arm or clock on the wall.
o Intuitive setup consists of flipping switches or twisting knobs.
o The ElectraSoft PID Solder Pot
uses PWM to create a unique PID.
- PWM stands for Pulse-Width-Modulation.
PWM is a technique for getting analog results with digital means. Digital control is
used to create a square wave, a signal switched between on and off.
- PID stands for Proportional-Integral-Derivative.
PID control provides a continuous variation of output within a control loop feedback
mechanism to accurately control the process, removing oscillation and increasing
process efficiency, as seen in this image:
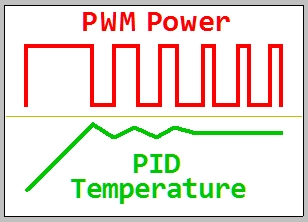
PWM controlled PID wave form
|
|
|
Copyright 2009 Flare Stack Fabrication by ElectraSoft. All rights reserved.
|
|